
DIY pipe insulation is a straightforward yet effective method for homeowners to improve energy efficiency, reduce heating costs, and minimize environmental impact. By wrapping hot water pipes with insulation, you retain heat, maintain consistent temperatures throughout the house, and ease the strain on your heating system. This is especially beneficial in older homes or areas with temperature fluctuations. Using materials like fiberglass, foam, or mineral wool, cut and install insulation with adhesive, securing it tightly for optimal performance. Proper DIY pipe insulation enhances hot water delivery speed, reduces heat loss, contributes to energy efficiency, and potentially lowers energy bills, making it a valuable project for any homeowner.
Looking to cut down on hot water waiting time and boost your energy efficiency? Insulating hot water pipes is an effective, DIY-friendly solution. This article guides you through the process of understanding why and when to insulate your pipes, provides a step-by-step installation guide, and highlights the significant benefits of proper pipe insulation. Discover how this simple step can revolutionize your daily routines and contribute to energy conservation.
- Understanding DIY Pipe Insulation: Why and When to Insulate Hot Water Pipes
- The Step-by-Step Guide: How to Effectively Insulate Your Hot Water Pipes (DIY)
- Benefits of Proper Pipe Insulation: Faster Hot Water & Increased Energy Efficiency
Understanding DIY Pipe Insulation: Why and When to Insulate Hot Water Pipes
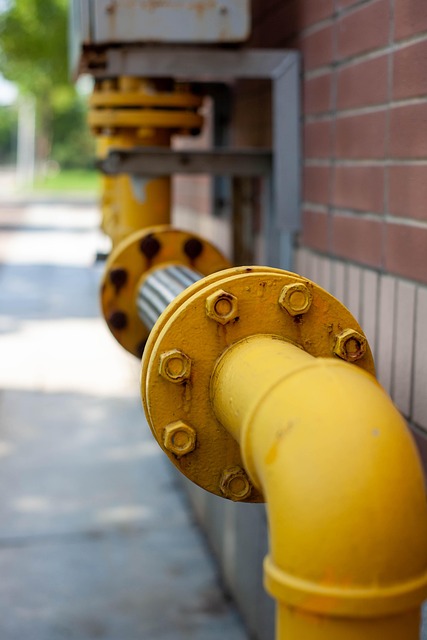
Insulating hot water pipes is a simple yet effective way for homeowners to boost their energy efficiency and enjoy faster access to hot water. DIY pipe insulation has become increasingly popular as folks look to cut down on heating bills and reduce their environmental footprint. By wrapping your hot water pipes with insulation, you’re essentially minimizing heat loss, ensuring that more of the hot water generated by your heater is retained and delivered to your faucets and showers when needed.
This is particularly important in older homes where pipe systems might be exposed to cold air or located in areas prone to temperature fluctuations. Even new constructions can benefit from DIY pipe insulation as it helps maintain consistent water temperature throughout the house, reducing the strain on the heating system. Insulating hot water pipes is a straightforward process that doesn’t require professional skills, making it an accessible project for anyone looking to take control of their energy usage and home comfort.
The Step-by-Step Guide: How to Effectively Insulate Your Hot Water Pipes (DIY)

Insulating your hot water pipes is a straightforward DIY project that can significantly improve your plumbing system’s efficiency and speed. Here’s a step-by-step guide to help you get started:
1. Gather Materials: Before beginning, ensure you have the necessary tools and materials, including pipe insulation (made from fiberglass, foam, or mineral wool), a utility knife, measuring tape, and an adhesive suitable for pipe insulation. Choose insulation based on your pipes’ size and the temperature of your hot water supply.
2. Measure and Cut Insulation: Using the measuring tape, determine the length of pipes you need to insulate. Cut the insulation to fit perfectly around each pipe, ensuring there’s a few extra inches at both ends for sealing. This step requires precision, so take your time to measure accurately.
3. Apply Adhesive and Install Insulation: Spread the adhesive along the pipe, starting from one end and working your way out. Place the insulation over the pipe, pressing it firmly against the adhesive. Ensure there are no air pockets or gaps for optimal efficiency.
4. Secure and Seal: Once the insulation is in place, use pipe clamps or tape to secure it tightly around the pipes. This step prevents the insulation from shifting and ensures a snug fit. After the adhesive dries, remove the clamps or tape, and check that the insulation remains in place.
Benefits of Proper Pipe Insulation: Faster Hot Water & Increased Energy Efficiency
Proper pipe insulation offers a multitude of benefits, especially for those who rely on hot water systems in their homes. One of the most noticeable advantages is the significant speed boost when it comes to getting hot water. Without insulation, cold water from pipes mixed with hot water reduces the overall temperature of the outgoing stream. By insulating your hot water pipes, you create a barrier that prevents heat loss, allowing hot water to reach your faucets and showers much faster. This is especially beneficial during chilly mornings or if you’re located in colder climates.
Moreover, DIY pipe insulation contributes to increased energy efficiency. It acts as an insulator, minimizing the amount of heat transferred from the hot water pipes to the surrounding environment. As a result, less energy is required to maintain the desired water temperature, leading to potential savings on your energy bills. This simple yet effective measure can make a substantial difference in reducing energy consumption and contributing to a greener home.
Insulating hot water pipes is a simple yet effective way to boost energy efficiency and get hot water faster. By following a straightforward DIY process, you can significantly reduce heat loss, especially in older homes or during colder months. This not only saves money on energy bills but also contributes to a more sustainable home environment. Implement these steps, and enjoy the benefits of quicker hot water access while being eco-friendly – a win-win for both your wallet and the planet.